Saturday, November 21, 2020

Hilltop Lava River Terrain Board


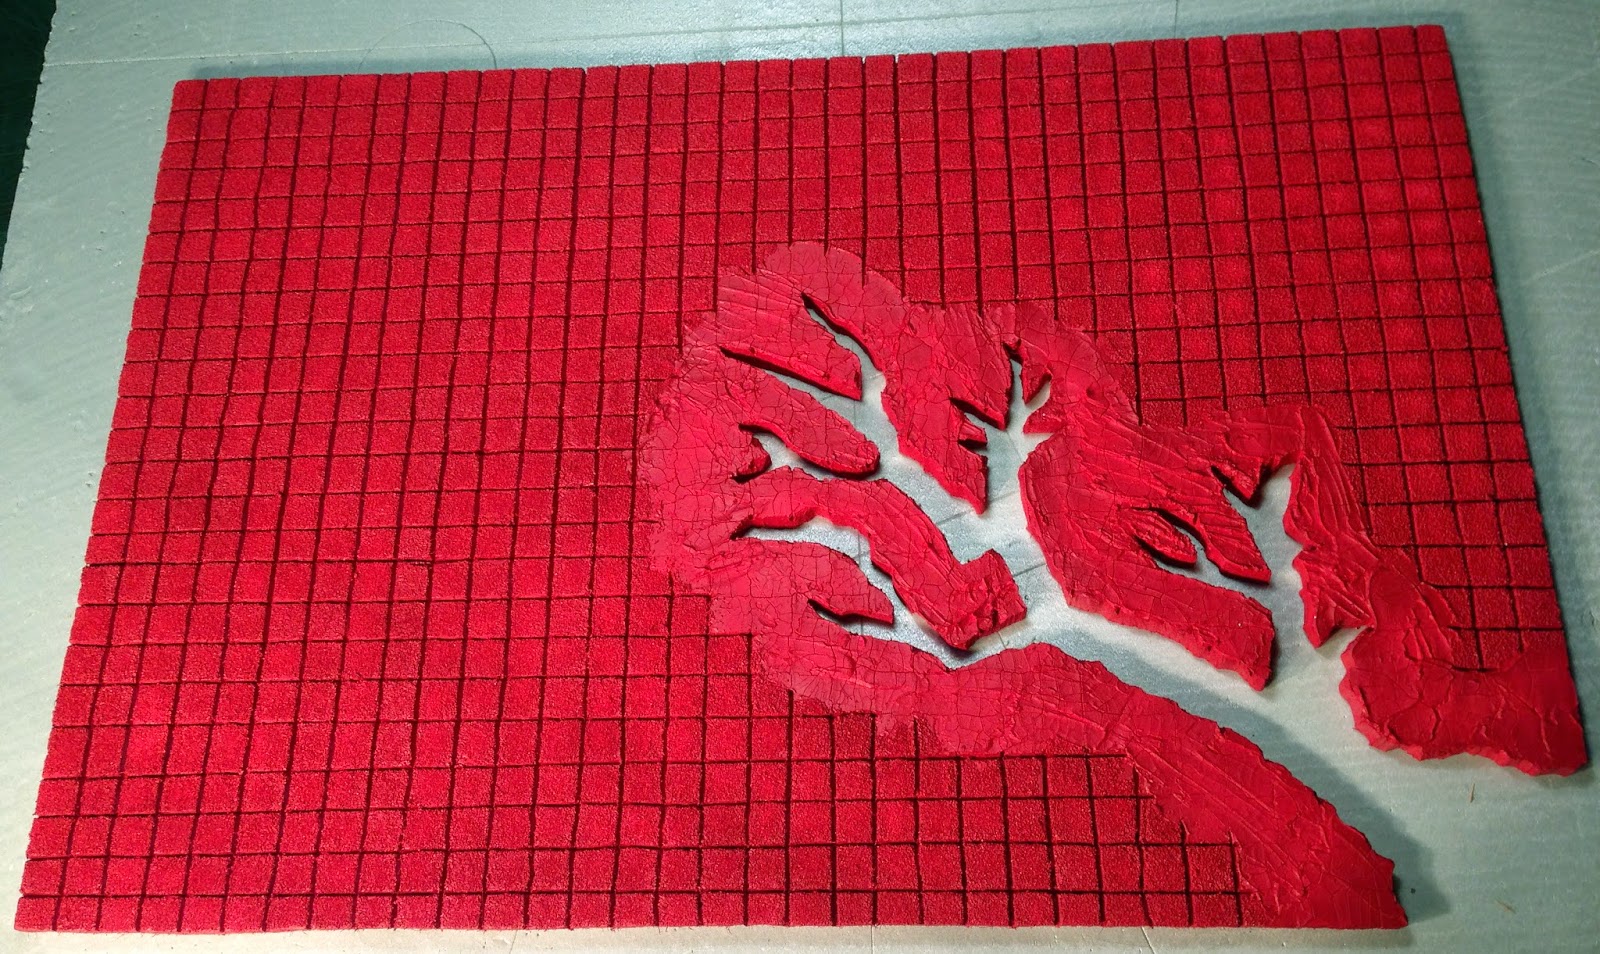
Here is the basic layout I'm going for in this terrain piece. I have a 4'x8' sheet of 1" thick extruded polystyrene all cut up already and I think I like the way the hill is layed out.  Polystyrene was cut with Hot Wire Foam Factory's 6" Hot Knife


Foam boards are glued together with Liquid Nails Panel & Foam Adhesive. I just stacked up some large heavy books on top, after the foam pins were set in place. Glued the Craters in place. Cut a hole in the middle of the board where the stairwell will go and glued into place. A little filler was needed to hide the seams. Primed the areas in white that are going to be painted red later.


The edges of the lava river are coated with Crackle Paste. I globbed it on really thick in order to get some nice deep fissures when it dries. Using paintable white caulk I created the lava itself.


Coated and sealed the boards gaps with paintable caulk.


I gave the board a coat of Elmer's glue watered down with Windex and applied the sand. The Crackle Paste is now dry but the fissures are not done cracking yet. The caulk for the lava needs a couple more days to cure.


It's been six days drying.... the lava is almost dry enough to paint. The Crackle Paste has made some great fissures and a nice textured base. Just have to carefully vacuum the extra sand that didn't adhere to the board.


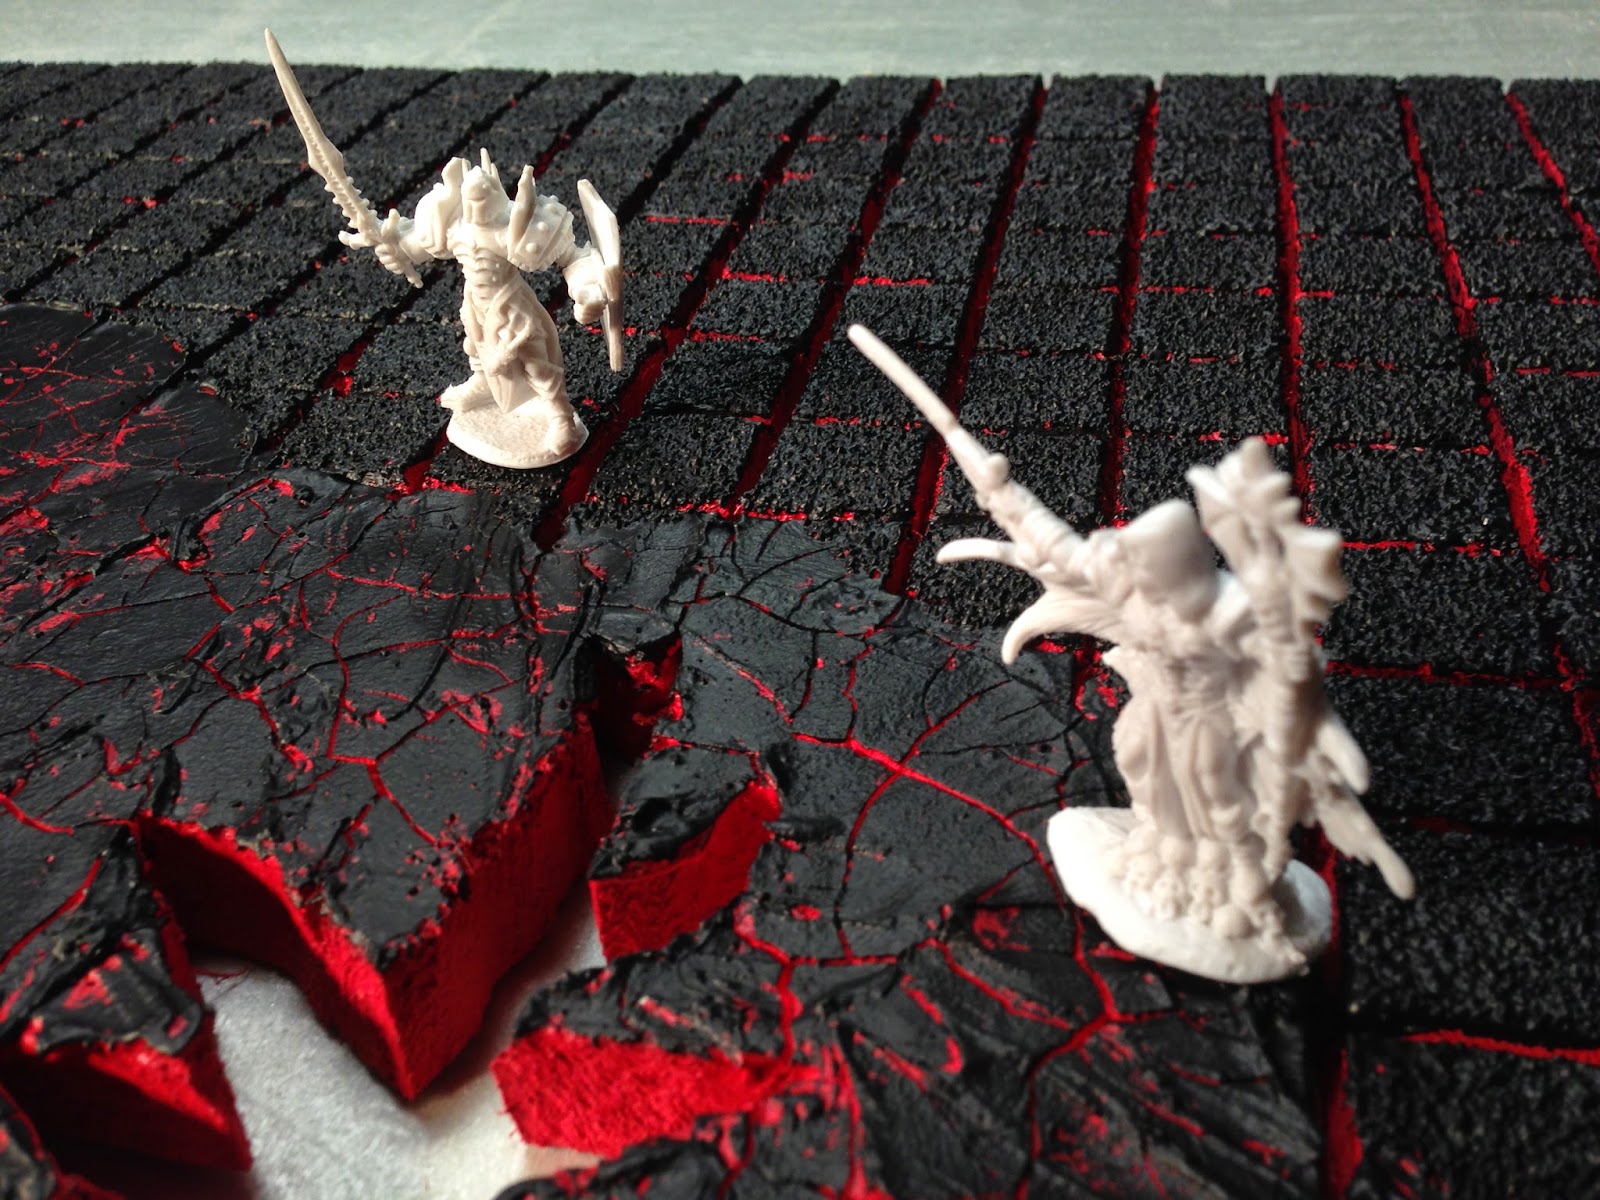
Everything white gets painted red.


I can see a lot of motion in the lava river already!


Next, is to base the board black like lava rocks with the red showing through and then highlighted with orange, yellow and white.


I ended up 3D-Printing some Cavern Floor Tiles from Thingyverse.com


Wednesday, March 11, 2015

Dungeons & Dragons Lava Terrain Board


Today I thought I would continue my miniature wargame terrain project. This one's for Dungeons & Dragons style play with the 1 inch grid. It's going to be a lava board with a giant fissure running from the corner. Still using 1 inch thick foam board, I got out my Hot Wire Foam Factory Precision Engraver and went to work. This lava board measures 23" x 36" and took me a little over an hour to cut the 1" grid you see here.


Here is the initial fissure cut, I made it a little wider after the fact so I could get access to the fissure to paint and add lava.


I found some Pro-Art Golden Crackle Paste at Michaels art store for around $17.00 before using the 40% off 1 item coupon. Later I discovered there is an A.C. Moore Arts & Crafts store about 20 miles from my house and they were charging around $11.00 before the 50% off 1 item coupon for the same 8-ounce Crackle Paste. It's a little farther away but the money I save is well worth it.


I also picked up some large grit sand and started covering the board with it using Aleene's Original Tacky Glue. It's a little thicker than Elmer's White Glue so it works perfectly for building terrain projects, and also good for putting together Hirst Arts mold castings, another project for the future.


I used a whole 8 ounce jar of the Crackle Paste for this project and should have used a bit more to make it thicker so that the fissures would get wider.


After the glued sand and Crackle Paste dried, I painted the 1" grid with white primer latex. This will help make the paint brighter when I airbrush it red next.


Games Workshop Stops Making Their Warhammer Moon Craters


 So what am I going to do now that Games Workshop stopped making their Warhammer Moon Craters. Now the only place to get them is on eBay and people are charging like $50.00 to $60.00 for the full set which originally cost $25.00! Fret not, the only way to get around this is to make a mold of each crater. It will take some time to coat the craters with 12 layers of Castin' Crafts Mold Builder Liquid Latex Rubber. 


Well, layer 1 is done. Only 11 more until I can cast it in plaster. I'm using some heat lamps to quicken the drying process.


I will use these Moon Crater castings to make a series of 23" x 36" Miniature Wargame Terrain Boards that will fit together to make a really large display.


Monday, May 27, 2013

Making a Lava Board for Miniature Wargame Terrain


This project took several days to complete, mostly because of the drying times in between adhering the Crackle Paste and Caulk and Paint to the MDF Board. I first started with a block of 1" foam insulation and carving the cracks where the lava flow will be. Here I just taped the foam board to the MDF board to manage where the Paintable Caulk will go to form the lava.


I started making the lava from the middle out by dabbing pretty good sized globs of Paintable Caulk to the MDF Board


Where the cracks are in the middle of the board, the lava blobs came out perfect. I started out making smaller blobs and making sure to dip the end of the Caulking Gun in the blob to make the tips of the lava to come to a point. I later realized that the bigger blobs don't look right, some are too big near the edge of the board. I will later go through a second time and place smaller blobs in between the first set of blobs to even out the board a little


It's better to use smaller blobs of caulk for drying purposes too, this board took 3 days to dry enough to paint.


In this step I took the foam board off and started applying Crackle Paste on the edges of the foam board where the lava will be. Be sure to prime the whole foam board before applying the Crackle Paste and paint or else it will have problems adhering to the foam board.


Apply a generous amount of Crackle Paste with a putty knife, I should have gone thicker with the Crackle Paste to get the cracks and fissures bigger. This took two days before the cracks started showing up, probably longer the thick er you apply the Crackle Paste.


Now for the first coat of paint, use a bright red color, the brighter the better. I used interior house satin finish latex from the local hardware store, thinned down quite a bit to use in the airbrush. The color i used is Stadium Red from the Ralph Lauren color collection. Make sure what you are painting is white or else the red will be rather dark, and you want this thing to glow, right? I used white caulk, but if you only have clear caulk make sure to base it white before applying the red.